
The last time we spoke on brick and mortar, we focused on the joints. Specifically, one part of the process, pointing and its variants:
- Pointing, the finishing of the mortar joints
- Repointing, repairing said joints
- Some specific varieties: tuckpointing, flush pointing, strap pointing, and grooved pointing
Today we will be going over those joints themselves and more ways they can be pointed, as I promised in that very blog. The most important part of the form of the structure, though materials may be the essential part.
Brick Mortar Joints
Here we shall call the bricks or stones “masonry units.” First, it is best to understand that horizontal and vertical joints may be of different types, and some forms may be exclusively used for one direction.
Second, let me refresh you on the point of mortar. It isn’t just the glue; it’s the buffer. When a car crashes, the bumper is meant to absorb some of that damage before the car; in that same way, the mortar is intended to take the damage from weathering, not the units. It has a ton of weight on its shoulders.
The mortar needs to be able to both absorb moisture from the bricks and leak it out; this is often referred to as “breathing.” Yet it also must keep water from getting past it, along with air or dust. It needs to be soft enough to squeeze as gravity pulls the house and the land around the building and the structure itself down, and the walls creak, crack, and settle. The tectonic motion also can affect settling, and if on softer soils, more room for settlement needs to be accounted for.
Lastly, there is the appearance of it, while often the result is dealt with in pointing to make it look good, and this isn’t much an obstacle with plaster as it completely covers, the way the initial mortar is set does affect the final look of the wall. The appearance is always technically pointing as pointing is the finishing of the joints. Struck Joints can be called Struck Mortar Joints or Struck Pointed Joints, and both should be understood; however, even when laying the mortar, one should have the end style in mind.
Struck Pointed Joints
This is a style mainly used for horizontal joints, where the mortar indents 45° downward; that is to say, it recedes at the bottom edge in a smooth transition. The top edge is finished flat with the unit above.
This style is best for interior walls, as it holds water that finds its way in keeping it in the indent and thus in the wall. This holding of water lets some through as it is absorbed into the units or the mortar, which is against the purpose of mortar, especially for exterior walls.
Aesthetically it does give an interesting shadow effect where the units seemingly pop out from under one another. That’s to say, it emphasizes the horizontal rows, especially when the units are well made, which is its only pro. It’s like tuckpointing, purely for style.
Weathered Pointed Joints
So take the struck joint and flip it upside down; now you have the weathered mortar joint. They are sometimes referred to as Weathered Struck Joints. The same as their sibling, they are best used for horizontal joints.
Unlike their inverted sibling, one can use weathered joints for exterior walls. Water slides off it instead of staying there or penetrating through. However, due to this very boon, they often require repointing—water “weathers” down the joint as it constantly moves along its surface.
Appearance-wise they give an actual shadow effect right under each brick, having them appear to pop. This has the same boon as its sibling giving attention to well-shaped brickwork and an ordered appearance.
Concave and Vee Pointed Joints
The Concave and Vee are both similar, the only difference being that Concave joints are curved and Vee joints are angled. Both are popular as well. To best describe a concave joint, please imagine running your finger softly pressing into clay in a straight line—that small indent in a concave shape. Vee joints are similar but with the edge of a cube. Both vertical and horizontal joints can be done in this style.
While both can be done with standard tools, it isn’t easy to be consistent with them. As such, there are tools specifically meant to do this. Unlike the Struck and Weathered joints, these are made with function in mind with excellent sealing capabilities, both for structure and against water. Vee joints struggle a little more against water; however, it should work excellently if correctly done.
Appearance-wise they are little help, though vee joints offer both pops that the struck and weathered joints give to a lesser extent.
To be clear, concaved joints and groove pointing from last time are synonymous. They may also be called “rolled” joints.
Flush Pointed Joints
We spoke of these in the other blog quickly, but to go more in-depth with them, in shape, they are flat and even with the units. Since this has the water just wash across the wall, it is possible that extra weathering may occur. It is not recommended to use this joint type less compacted, which means the units are very close to one another.
Plaster is liable to crack in line with the units. Masonry veneers, walls with a non-structural layer of masonry often for protection from water or just to look good when honed with flush joints can find the mortar flicking out. Speaking of things with mainly aesthetic value, if one wishes for some texture, they can have these brushed and not completely flushed, a process that offers little in any other way.
Raked Joints or Rake Pointed Joints
So another joint style only for interior walls is the Raked style, where they press in the mortar pushing the wall’s flat deeper in. This makes the units’ shape and quality apparent giving them a strong pop with harsh shadows. But it exposes much of the units to weathering, so it’s a true style over substance joint.
Like the flush joints, raked joints come in both smooth and brushed varieties. Both give the wall a cared for appearance, but again some just prefer that bit of texture.
Convex Pointed Joints
As the name may denote, convex joints are in a way the opposite of concave joints. They are kin with the Extruded Joint, which is what one gets when they just press two bricks upon another with mortar in the middle. Convex joints look similar but are deliberately shaped, with the excess being cleaned (or brushed for texture) to give a better, more purposeful look. This style takes the longest and the most expertise and, to some, may look strange.
Sadly, due to having ledges, this time the mortar and not the brick, it is not the best fit for exterior walls. Likely the excess mortar will be weathered away, ruining the appearance of the wall and leaving it uneven. This also may let water get in or sit near the bricks. The pro is that some like the super clean and unique look of this joint style. It gives a wall a sturdy and built appearance with clean shapes and stark shadows. Repointing will come along more with this joint if one wishes to keep it well-shaped.
Bead Pointed Joint and Grapevine Pointed Joint
Beaded joints are similar to the Convex Joint, but instead of the entire mortar coming out, a small ridge extrudes in the middle of the mortar. It has an exciting shadow effect and certainly a unique appearance. Otherwise, this joint is identical to a flush joint. The bead is likely to vanish with weathering, so this architect’s joint is not a fan favorite among engineers who focus on function. To keep this appearance, you likely will need repointing often.
Contrary to the beaded joint is the grapevine joint, a flush joint with a small indented ridge center. Often it’s not straight, giving it a grapevine pattern. Like the bead, this small detail is liable to erode on an exterior wall and needs repointing as it is likely to end in the exposure of the brick. Many of these designs are based on appearance, and the differences may not be pronounced for a chimney.
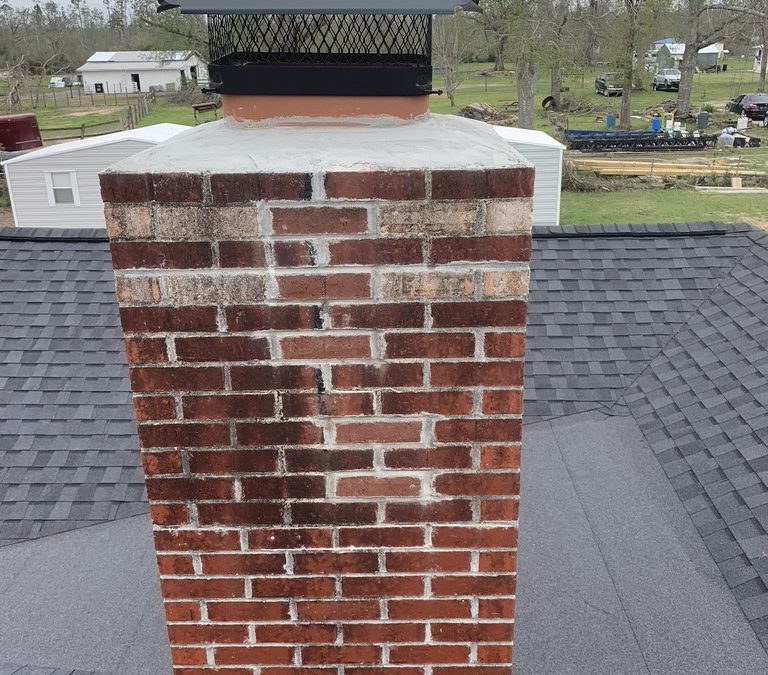
So For a Chimney?
I’d recommend a concave or vee joint, maybe with tuckpointing. A flush join may be okay, and if you want a unique look that may still be visible from a distance, perhaps consider a convex joint. Keep in mind that the repointing of said style for a chimney is likely to need upkeep more than the others recommended here.